Finally, I got a couple of hours to upgrade my lab from vSphere 6.7 to vSphere 7. Following one of the announcements during VMworld 2019, this new release comes with some great functionalities like the native support of Kubernetes, the dynamic hardware assignment, and some enhancements on DRS, vMotion, etc… For my lab purpose, I’m focusing on container stuff and I’m taking the chance of the upgrade to write in this post how to upgrade the vCenter and how to make living together ESXi 6.7 and ESXi 7 hosts. Let’s see in-depth.
Just some requirements
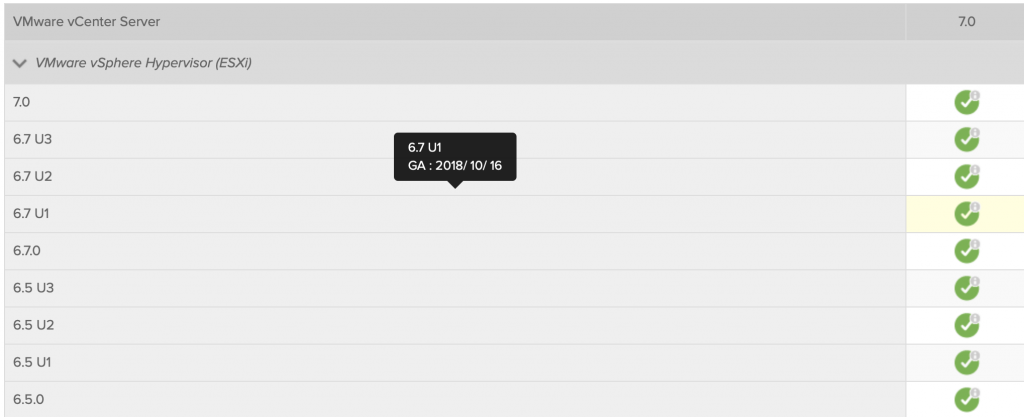
As written here, my lab is ruled by a single vCenter server with two physical ESXi hosts and 2 nested ESXi hosts. So the goal of this upgrade is to have vCenter 7.0 with physical ESXi 6.7 (a transitory situation) and nested ESXi 7.0 hosts with vSAN. In fact, based on VMware interoperability matrix tool, a vCenter Server 7.0 could manage all vSphere 6.5 and 6.7 hosts too:
Before proceeding with the ESXi upgrade, I highly suggest taking a look at William Lam’s post.
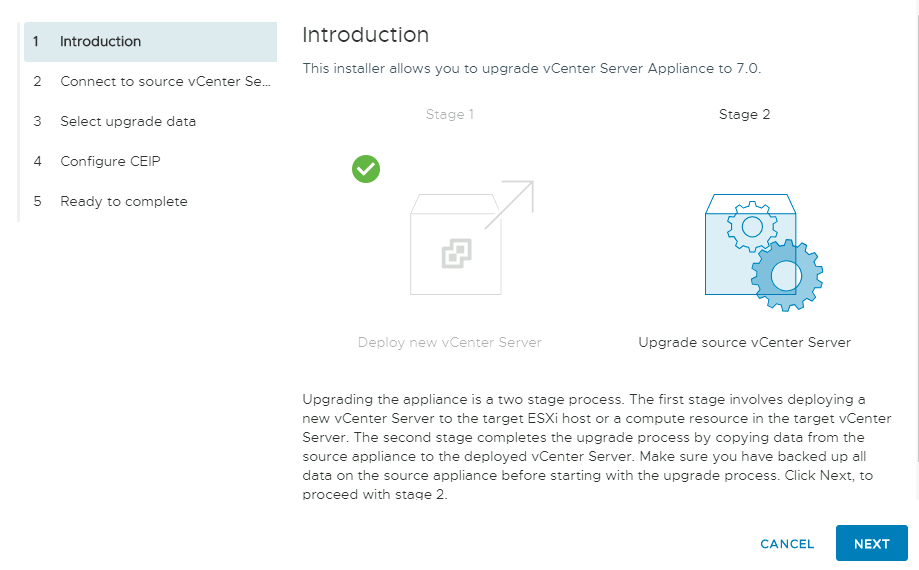
The processes involved in the vCenter upgrade are essentially composed of 2 steps:
- deploy a new vCenter with a temporary IP
- final steps like data migration, change of IP and shutdown of the old vCenter
Obviously before proceed, especially in a production environment, backup your old vCenter using the backup feature in the appliance.
It’s necessary to have enough storage space to successfully complete the upgrade. It requires more or less the same consumed capacity of the old vCenter. Unfortunately in my lab and more precisely in the management environment, the direct storage has no room for further virtual machines. So I plan the deploy and migration phase in the workload environment, then, after ensuring that all is working, I delete the old vCenter and migrate the new vCenter using the NAS.
During the upgrade process, the client (your PC or MAC or a VM with GUI) which is running the process must reach the old and new vCenter, the ESXi hosts involved in the process, and the DNS server.
The vCenter update process
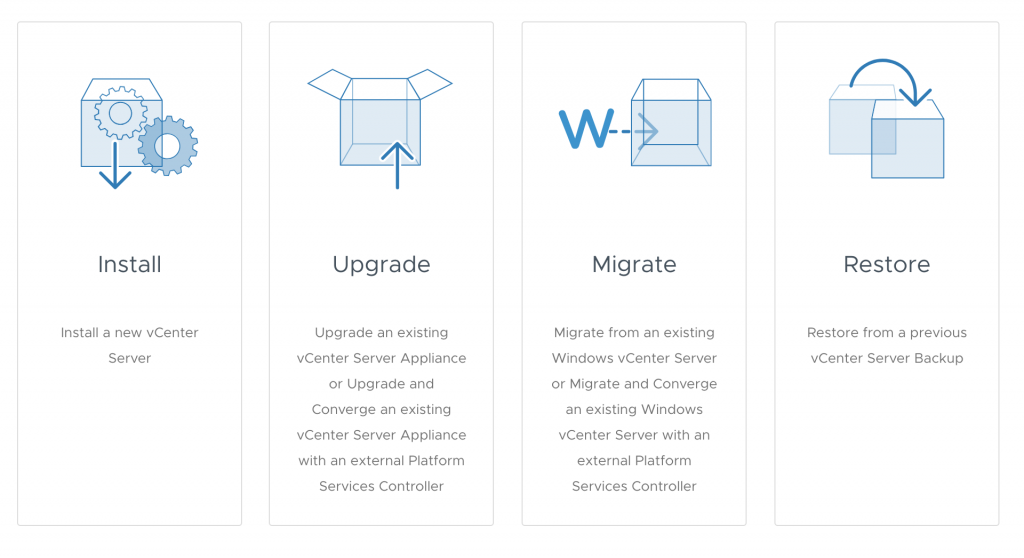
The update process is really simple and guided: after downloading the vCenter installation ISO from your my.vmware.com account and attaching to a virtual DVD it’s possible to start choosing the second of the following options:
Then following some simple steps:
- Accept EULA
- Provide source VCSA connection data
- Specify the target ESXi host where to deploy new VCSA
- Provide target VCSA data (hostname and root password)
- Choose deployment size (in my case tiny)
- Select datastore
- Configure network settings
- …and finally the start of stage 1
Before proceeding with stage 2 is important to choose what really matters to import from the old VCSA to new.
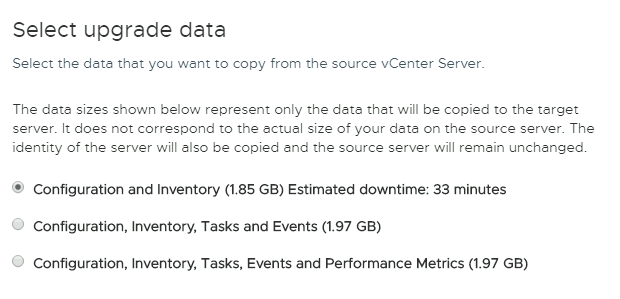
After the competition of stage 2, it’s possible to connect to the new vSphere 7 vCenter using the old vCenter FQDN.
Nested ESXi 7
The nested cluster ESXi could simply replace it with a new couple of virtual ESXi… Thanks to Wiliam Lam I simply downloaded the virtual appliance from his site here and after a few steps, I got my vSAN cluster based on vSphere 7 nodes.