In the previous chapter of this study notes, we’ve introduced the main concepts that are at the basics of Terraform and that determine the real difference between automation made by “simple scripts” and the “real automation” made by declarative models, desired state, etc… Let’s continue with Terraform Certification Associate study notes. This chapter will cover Terraform’s first steps:
- Terraform Installation
- Build infrastructure
- Change
- Delete infrastructure
Let’s see in-depth
Installation
To use Terraform you will need to install it. HashiCorp distributes Terraform as a binary package. The supported platforms are:
- macOS
- Intel 64bit
- Silicon M
- Windows
- Intel 32bit
- Intel 64bit
- Linux
- Intel 34bit and 64bit
- ARM 32bit and 64bit
- FreeBSD
- Intel 32bit and 64bit
- ARM
- OpenBSD
- Intel 32bit and 64bit
- Solaris
- Intel 64bit
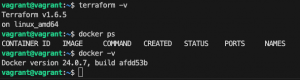
Verify that the installation worked by opening a new terminal session and listing Terraform’s available subcommands:
|
1 |
terraform -help |
Add any subcommand to terraform -help to learn more about what it does and the available options (following the example with “plan” command)
|
1 |
terraform -help plan |
It’s possible to use either Bash or Zsh for the tab completion for Terraform commands:
|
1 2 3 |
touch ~/.bashrc terraform -install-autocomplete |
The following examples will use docker( or Podman) as the target infrastructure. Check my GitHub repo for all you need to start using Terraform in a VMware Workstation/Fusion VM based on Ubuntu. (In the same repo you’ll find also all the examples contained in this study note).
Source: https://developer.hashicorp.com/terraform/install
The Core Workflow
The main workflow is composed of the following steps:
- Prerequisites: To start handling an infrastructure you need
- Target configuration (eg.: if you want to deliver “things” in AWS you need AWS_ACCESS_KEY_ID and AWS_SECRET_ACCESS_KEY)). In this guide, you simply need the access to docker instance (in the terraform_lab VM, the Docker connection is allowed using vagrant user)
- Target CLI (in this case docker CLI)
- Terraform CLI (1.2.0+) (already available in the terraform_lab VM)
- Build Infrastructure
- Write Configuration: The set of files used to describe infrastructure in Terraform is known as a Terraform configuration. Each Terraform configuration must be in its working directory. After creating the config directory, create main.tf in it and edit with your preferred editor (I use Visual Studio Code)
- Terraform block: The
terraform {}block contains Terraform settings, including the required providers. For each provider, thesourceattribute defines an optional hostname, a namespace, and the provider type - Providers
- Resources
- Terraform block: The
- Initialize the directory
- Format and Validate the configuration
- Create the infrastructure
- Inspect the State
- Manage the State
- Write Configuration: The set of files used to describe infrastructure in Terraform is known as a Terraform configuration. Each Terraform configuration must be in its working directory. After creating the config directory, create main.tf in it and edit with your preferred editor (I use Visual Studio Code)
- Change Infrastructure
- Destroy the Infrastructure
Following is the example code we’re gonna use in this Study note:
|
1 2 3 4 5 6 7 8 9 10 11 12 13 14 15 16 17 18 19 20 21 22 23 24 25 |
terraform { required_providers { docker = { source = "kreuzwerker/docker" version = "~> 3.0.1" } } } provider "docker" {} resource "docker_image" "nginx" { name = "nginx" keep_locally = false } resource "docker_container" "nginx" { image = docker_image.nginx.image_id name = "tutorial" ports { internal = 80 external = 8000 } } |
For Public-Cloud lovers such as AWS, it’s possible to follow the official Terraform examples guide: https://developer.hashicorp.com/terraform/tutorials/aws-get-started/aws-build
Before applying let’s dive into every block.
The terraform {} block contains Terraform settings, including the required providers Terraform will use to provision your infrastructure. For each provider, the source attribute defines an optional hostname, a namespace, and the provider type.
Terraform installs providers from the Terraform Registry by default. In this example kreuzwerker/docker is shorthand for registry.terraform.io/kreuzwerker/docker .
The provider block configures the specified provider, in this case, docker. A provider is a plugin that Terraform uses to create and manage your resources.
The resource blocks define the components of your infrastructure using the format <resource_type> <resource_name>. The prefix of the type maps to the name of the provider. In the example configuration, Terraform manages the docker_container resource with the docker provider. This generates also a unique ID to identify every resource managed in the current infrastructure as code. Eg: docker_container.nginx
Resource blocks contain arguments that you use to configure the resource. The allowed arguments for a resource are specific to that resource type, in this case, the image, name, and ports are documented here: https://registry.terraform.io/providers/kreuzwerker/docker/latest/docs/resources/container. Usually, there are required and optional arguments (in this case image and name are mandatory, and ports are optional)
Terraform directory initialization and validation
When you create a new configuration — or check out an existing configuration from version control — you need to initialize the directory with terraform init.
Initializing a configuration directory downloads and installs the providers defined in the configuration, which in this case is the docker provider
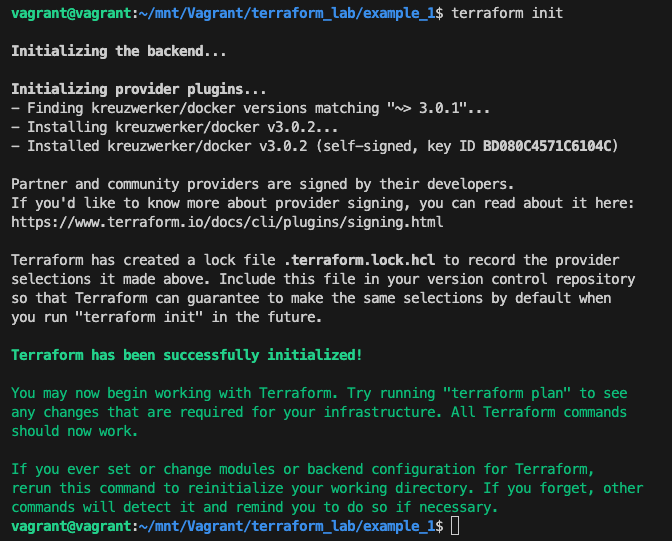
Terraform init performs the following actions:
- downloads docker provider and installs it in a hidden subdirectory of your current working directory, named
.terraform - prints out which version of the provider was installed
- creates a lock file named
.terraform.lock.hcl
It’s recommended to use consistent formatting in all of your configuration files. The terraform fmt command automatically updates configurations in the current directory for readability and consistency.
It’s also possible to make sure your configuration is syntactically valid and internally consistent by using the terraform validate command.
Executing changes to infrastructure (creation)
With terraform apply command Terraform will print the execution plan which describes the actions Terraform will take to change your infrastructure to match the configuration.
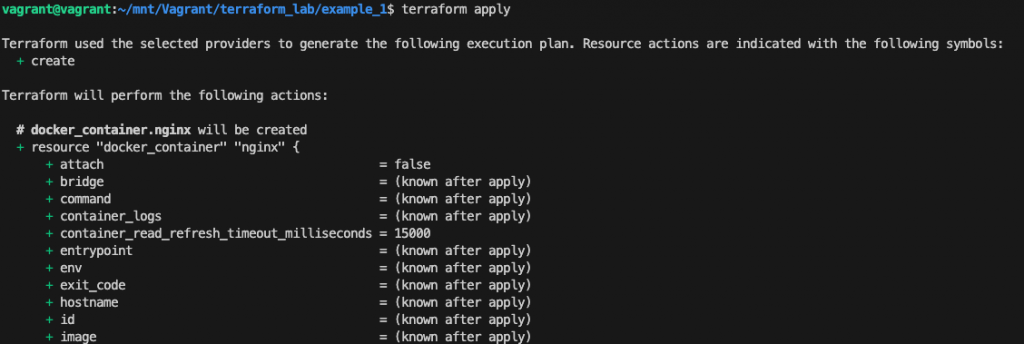
In this case the (+) near the resource “docker_container” “nginx” means that Terraform will create this resource.
Terraform will now pause and wait for your approval before proceeding. So typing “yes” Terraform will proceed with the real execution.
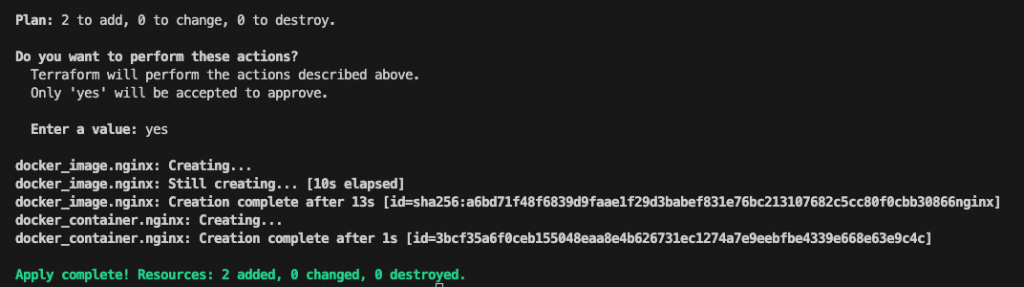
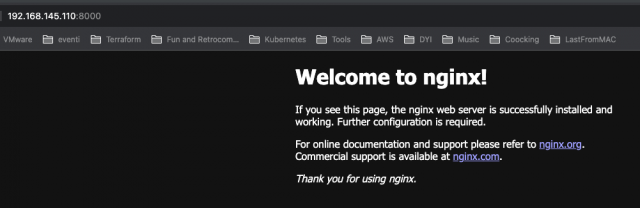
After creation point your browser to the VM ip (you can get this using Linux command “ip addr list”) and :8000 (in my case 192.168.145.110:8000)
Terraform State
Terraform wrote data into a file called terraform.tfstate to store the IDs and properties of the resources. Terraform state file is the only way Terraform can track which resources it manages so you must store your state file securely and restrict access to only trusted team members who need to manage your infrastructure.
In production, we recommend storing your state remotely with Terraform Cloud or Terraform Enterprise. In general, Terraform supports the following backends:
- local: The local backend stores state on the local filesystem, locks that state using system APIs and performs operations locally
- remote: The remote backend is unique among all other Terraform backends because it can both store state snapshots and execute operations for Terraform Cloud’s CLI-driven run workflow. It used to be called an “enhanced” backend
- azurerm: Stores the state as a Blob with the given Key within the Blob Container within the Blob Storage Account
- consul: Stores the state in the Consul KV store at a given path (support state locking)
- cos: Stores the state as an object in a configurable prefix in a given bucket on Tencent Cloud Object Storage (COS) (support state locking)
- gcs: Stores the state as an object in a configurable prefix in a pre-existing bucket on Google Cloud Storage (GCS). The bucket must exist before configuring the backend. (support state locking)
- http: Stores the state using a simple REST client. The state will be fetched via GET, updated via POST, and purged with DELETE. The method used for updating is configurable.
- Kubernetes: Stores the state in a Kubernetes secret (support state locking)
- oss: Stores the state as a given key in a given bucket on Stores Alibaba Cloud OSS. This backend also supports state locking and consistency checking via Alibaba Cloud Table Store, which can be enabled by setting the
tablestore_tablefield to an existing TableStore table name - pg: Stores the state in a Postgres database version 10 or newer (support state locking)
- S3: Stores the state as a given key in a given bucket on Amazon S3. This backend also supports state locking and consistency checking via Dynamo DB, which can be enabled by setting the
dynamodb_tablefield to an existing DynamoDB table name
To Inspect the current state, use terraform show
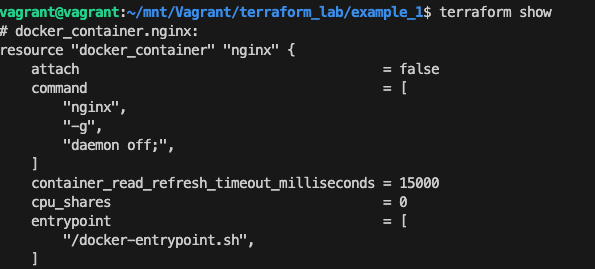
To Manually manage the state, Terraform has a built-in command called terraform state. Eg: terraform state list to list the resources in the project:

Source: https://developer.hashicorp.com/terraform/tutorials/aws-get-started/aws-build
Updating and Deleting configurations and infrastructures
Infrastructure is continuously evolving, and Terraform helps you manage that change. As you change Terraform configurations, Terraform builds an execution plan that only modifies what is necessary to reach your desired state.
When using Terraform in production, we recommend that you use a version control system to manage your configuration files and store your state in a remote backend such as Terraform Cloud or Terraform Enterprise.
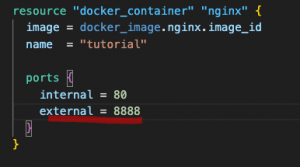
To see a change in action, just modify the port mapping with 8888 as the external port
Execute terraform apply to preview the execution and apply the changes:
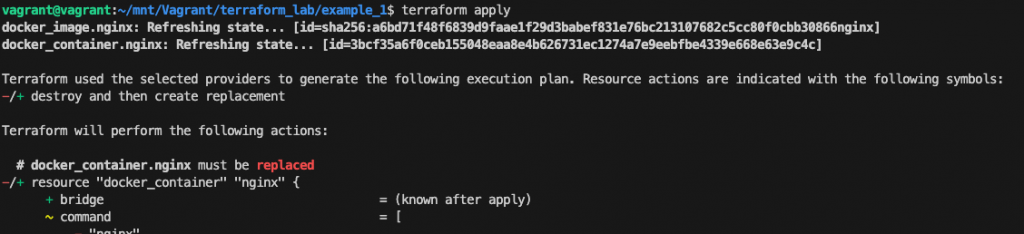
The prefix -/+ means that Terraform will destroy and recreate the resource, rather than updating it in place. Terraform can update some attributes in place (indicated by the ~ prefix) but changing the port the container must be destroyed.
Type yes to confirm and check the correctness by pointing the browser to http://<VM_ip>:8888
Source: https://developer.hashicorp.com/terraform/tutorials/aws-get-started/aws-change
Once you no longer need infrastructure, you may want to destroy it to reduce your security exposure and costs. For example, you may remove a production environment from service, or manage short-lived environments like building or testing systems.
The terraform destroy command terminates resources managed by your Terraform project. Like an update, Terraform will preview the execution using the - prefix which indicates that the instance will be destroyed.
Source: https://developer.hashicorp.com/terraform/tutorials/aws-get-started/aws-destroy
[…] Understand Terraform basics […]
[…] the previous chapter, we finally introduced the Terraform basic workflow composed of write, plan, and infrastructure […]