In this post I’ll show how to implement Nakivo RESTful API under Powershell using the cmdlet Invoke-RestMethod: an elegant and powerful way to call RESTFul API, implementing method GET, POST, PUT,… and handling results in object-oriented way (https://docs.microsoft.com/en-us/powershell/module/microsoft.powershell.utility/invoke-restmethod?view=powershell-5.1).
Using Nakivo API
Nakivo RESTFul API are accessible by the following endpoint: https://<nakivo_director_ip>:4443/c/router. It’s possible to perform the following actions:
- Authentication
- Inventory management
- Job management
- Repository management
- Backup object Management
- Transporter management
Every call must be a POST request that send a json data composed by:
- action: a string which contains the action invoked (Authentication, Inventory,…)
- method: a string which contains the method referred to the action invoked (login, getDiscoveryItem, …)
- data: array or JSON which contains the parameters for the invoked method
- tid: an integer which contains the transaction id (it must be increased to handle multiple requests per time)
- type: a string that must be “rpc” all times (probably referred to another implementation)
The result is a json which contains the operation result and the object data which contains further objects and arrays. Check official documentation here: https://helpcenter.nakivo.com/display/AR/API+Reference+Overview
To interact with the director is important handle the session retrieved after authentication management. If the user used in the authentication process, has the right permission, the next calls are authorized to interact with Nakivo actions and methods. I suggest to create a user for API implementation purpose which have a specific access; it’s not a good practice give administration rights to every application user due security concern.
Every time a new code is implemented is important to set the correct user rights the fits exactly in what the application need to do; but remember that if use active directory user you should not permit the password expiration, otherwise it could affect the application functionality
When you start the interaction with Nakivo API, you should perform a similar flow:
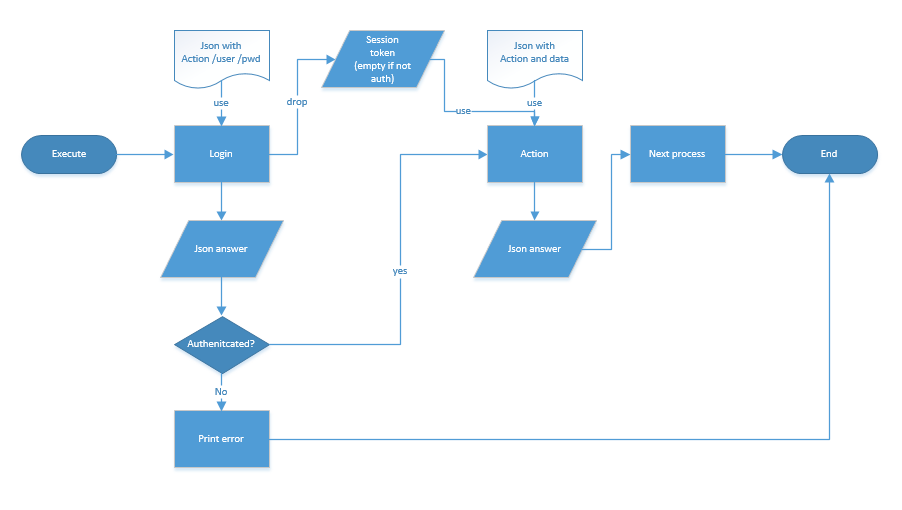
Then is possible concatenate further actions/methods or logout to close the session.
Before connect (untrusted ssl certificate issue)
During my test it could happen that due client execution policy, you could get a thrusting error message, that rejects the call due to not verified ssl end-point certificate. To workaround simply copy, paste and execute the following code, before starting using the calls:
|
1 2 3 4 5 6 7 8 9 10 11 |
add-type @" using System.Net; using System.Security.Cryptography.X509Certificates; public class TrustAllCertsPolicy : ICertificatePolicy { public bool CheckValidationResult( ServicePoint srvPoint, X509Certificate certificate, WebRequest request, int certificateProblem) { return true; } } "@ [System.Net.ServicePointManager]::CertificatePolicy = New-Object TrustAllCertsPolicy |
Authentication Process
Before starting the call is important declare a new “webrequestsession” object that will filled with the token data when you successful login:
|
1 |
$session=new-object microsoft.powershell.commands.webrequestsession |
Next it’s necessary compose the json with action AuthenitcationManagement, method login and authentication data:
|
1 2 3 4 5 6 7 |
$reqJson = '{ "action": "AuthenticationManagement", "method":"login", "data": [user,password,true], "type": "rpc", "tid": 1} '; |
Finally call the API using Invoke-RestMethod:
|
1 |
$data = Invoke-RestMethod -Uri "https://<nakivo_ip>:4443/c/router" -Method Post -Body $reqJson -ContentType "application/json" -WebSession $session |
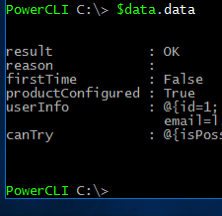
Here the results and the content of session variable after a succesful login:

Display Inventory information
After a successful login, you’re able to start the interaction with the other actions, remembering the inclusion of the $session var valorized during the login process which could be valid only if time doesn’t expire, or if isn’t invoked the logout method.
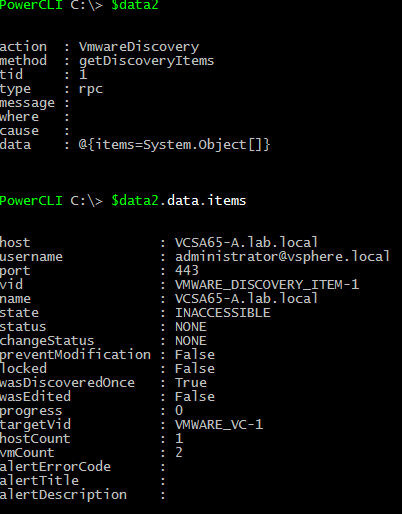
It’s time to show what Nakivo inventory discovery knows about the virtual infrastructure. Here the example:
|
1 2 3 4 5 6 7 8 |
$reqJson = '{ "action": "VmwareDiscovery", "method": "getDiscoveryItems", "data": null, "type": "rpc", "tid": 1 }' $data2 = Invoke-RestMethod -Uri "https://<nakivo_ip>:4443/c/router" -Method Post -Body $reqJson -ContentType "application/json" -WebSession $session |
And this is my result set in my lab:
Showing Job
IMHO the most important part of the interaction, is the job and recovery interactions. This time I’m showing how to display the information about the already configured jobs and how to display a single job. (In my next post I’ll show how to create/modify and launch a job).
The action JubSummaryManagement has a method called getGroupInfo that show the list of the jobs. This is important to get a single job by id and start with the interaction:
|
1 2 3 4 5 6 7 |
$reqJson = '{"action": "JobSummaryManagement", "method": "getGroupInfo", "data": [[null],0,false], "type": "rpc", "tid": 1 }' $data3 = Invoke-RestMethod -Uri "https://<nakivo_ip>:4443/c/router" -Method Post -Body $reqJson -ContentType "application/json" -WebSession $session |
Note: to get all jobs the data variable must contain [null]. The list contained in the object $data3 shows a job called “childJobsIds” that has id number 1.
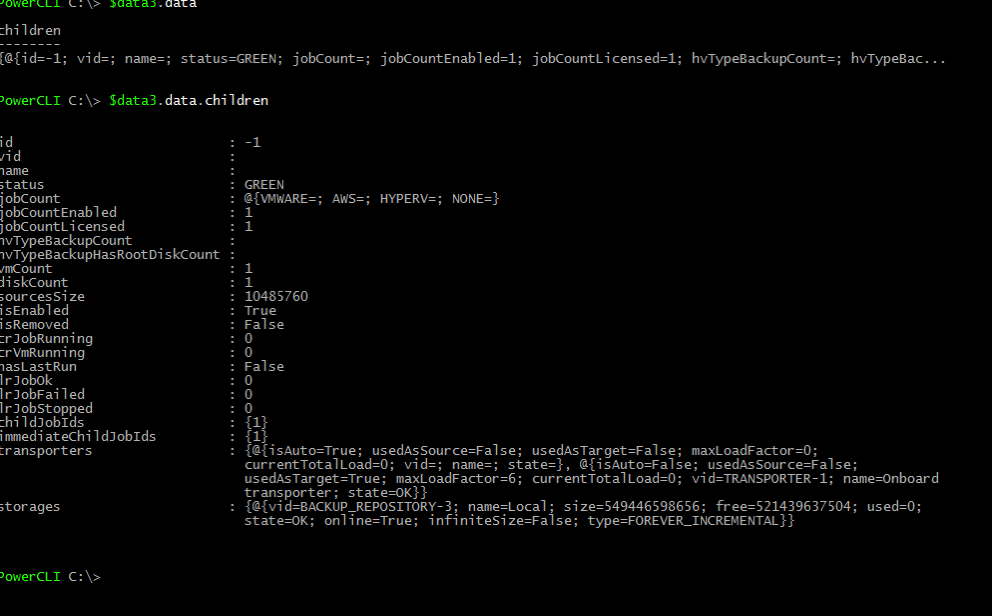
Then is possible to show job detail giving this id into data parameter:
|
1 2 3 4 5 6 7 8 |
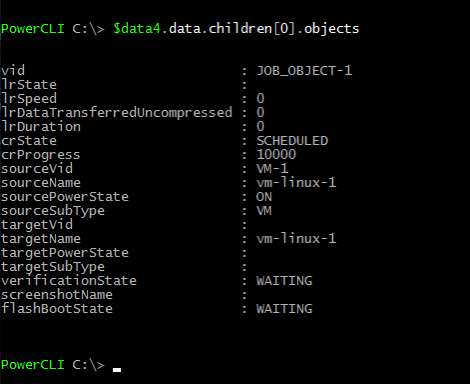
$reqJson = '{ "action": "JobSummaryManagement", "method": "getJobInfo", "data": [[1],0], "type": "rpc", "tid": 1 }' $data4 = Invoke-RestMethod -Uri "https://<nakivo_ip>:4443/c/router" -Method Post -Body $reqJson -ContentType "application/json" -WebSession $session |
This is the result:

Enjoy!
Disclaimer
This post is sponsored by Nakivo. Thoughts and experiences around Nakivo product come from my own.
