Cloudflare, one of the most important security platform in the world, is an interesting solution for surely publish and maintain contents over the internet. The ability to handle DNS acts as a reverse proxy and take care of the incoming connection from the Internet to my own server are the main reasons why I choose this platform for my website… BTW I keep under control my websites gaining the ability to make some improvements like certificate handling (I dream a world without HTTP clear connections).
In this post, I’ll show how to successfully configure Cloudflare to establish a secure connection with NGINX (in a container using Jwilder) and also handle a valid certificate for worldwide browsers.
The architecture
The architecture is very simple: all you need is a 2nd level Internet domain, a Cloudflare account configured as authoritative DNS and a host with docker and docker-compose installed. (For this project you can use also Kubernetes with an on-premise load-balancer).

The configurations
If networking is well configured, the steps to successfully realize this solution are really easy. The important things are the host availability and the correct certificate permissions.
All starts with the docker host… Just use this configuration for the front-end
|
1 2 3 4 5 6 7 8 9 10 11 12 13 14 15 16 17 18 19 20 21 22 23 24 25 26 27 28 29 30 |
version: '2' services: nginx: restart: always image: nginx container_name: nginx ports: - "443:443" volumes: - "./nginx/conf.d:/etc/nginx/conf.d" - "./nginx/vhost.d:/etc/nginx/vhost.d" - "/usr/share/nginx/html" - "./nginx/certs:/etc/nginx/certs:ro" networks: - backend nginx-gen: restart: always image: jwilder/docker-gen container_name: nginx-gen volumes: - "/var/run/docker.sock:/tmp/docker.sock:ro" - "/opt/docker/nginx/templates/nginx.tmpl:/etc/docker-gen/templates/nginx.tmpl:ro" volumes_from: - nginx entrypoint: /usr/local/bin/docker-gen -notify-sighup nginx -watch -wait 5s:30s /etc/docker-gen/templates/nginx.tmpl /etc/nginx/conf.d/default.conf networks: - backend networks: backend: driver: bridge |
And here you’ll find the template. Just make sure that the following statements are included in the container:
|
1 2 |
ssl_certificate /etc/nginx/certs/{{ (printf "%s.crt" $cert) }}; ssl_certificate_key /etc/nginx/certs/{{ (printf "%s.key" $cert) }}; |
After docker-compose up, it’s time to set up the “real” backend application. In this case, it’s possible to use my simple Apache-PHP image for application container:
|
1 2 3 4 5 6 7 8 9 10 11 12 13 14 15 16 |
version: '2' services: mainsite: restart: always image: linoproject/web:latest environment: - VIRTUAL_HOST=mysite.tld - VIRTUAL_PORT=80 volumes: - /.html:/var/www/html networks: - backend networks: backend: external: name: fe_backend |
Pay attention to the network: in order to ensure the correct communication through server frontend and backend, it’s important to specify to use the correct network name, in this case, “fe_network”, just check the output of the command
|
1 |
docker network ls |
Cloudflare certificate and tunings
The next steps are:
- Create and use Cloudflare or 3rd party SSL certificate:
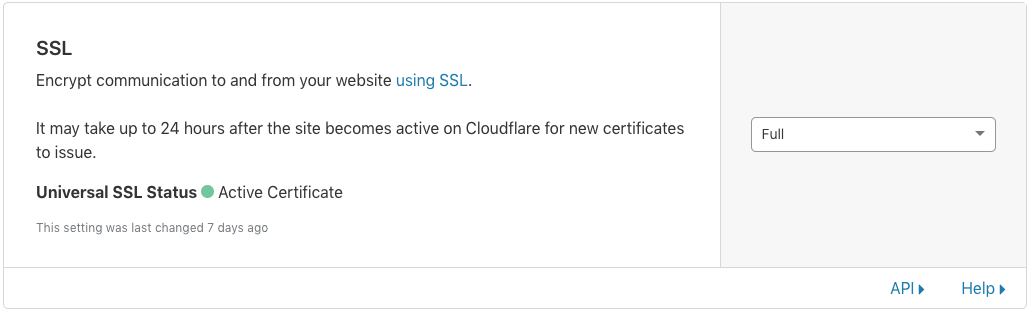
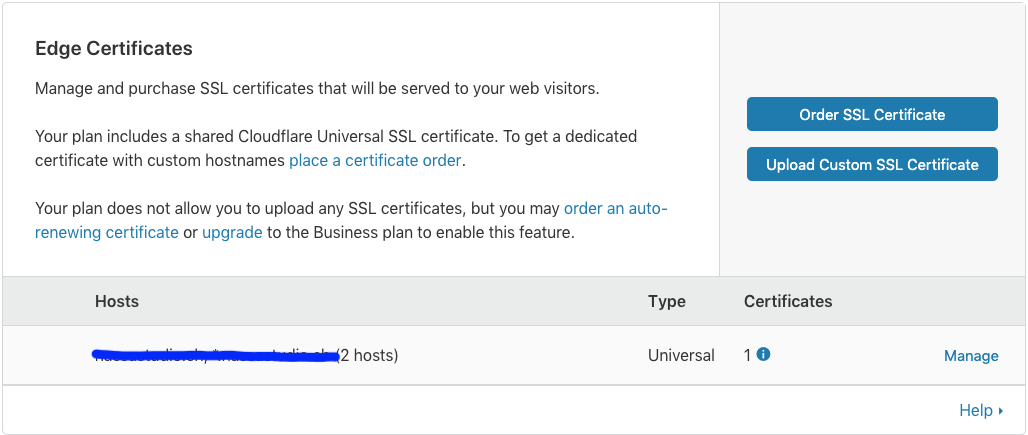
- Under Crypto menu, go to Edge Certificates and be sure you’ve got a universal certificate.
- Optionally you can order an SSL Certificate or upload a previously purchased.
- Create the Origin certificate
- It is possible to issue a single origin certificate (with private key) per application or wildcard certificate, depending on the deployment. (I highly suggest to issue a per application certificate to avoid unpredictable behaviors)
- Then simply copy the private keys and the certificates in the ./nginx/certs directory following the naming [fqdn].key and [fqdn].crt (Note: it’s possible to copy and paste if you’re on the SSH terminal) (Note2: remember to “chown/chmode” the certificate and the private key to avoid any forbidden usage)
- After a Jwilder refresh (depending on the version/installation in some case it’s necessary to compose down and up the application containers) the connection between Cloudflare and NGINX container is ready.
- Tune Cloudflare in order to force all element to work together:
- Under SSL (Crypto menu), choose SSL mode to Full (make sure you’ve got an active universal certificate)
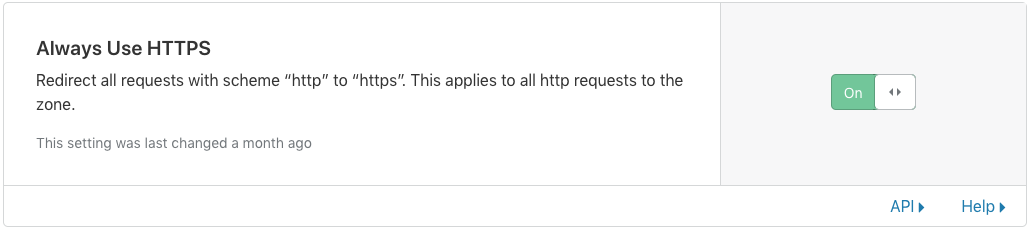
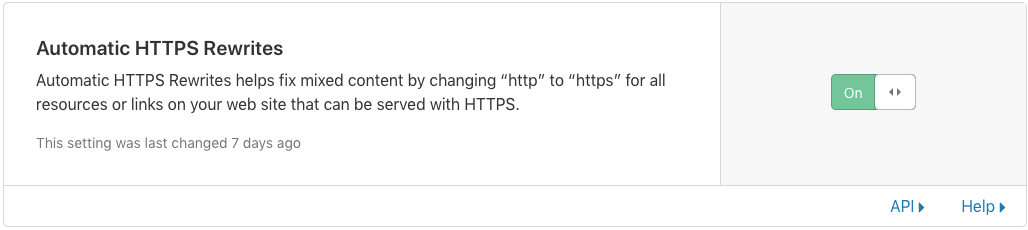
- Set to “ON” the section Always use HTTPS and also enable the automatic HTTPS Rewrite
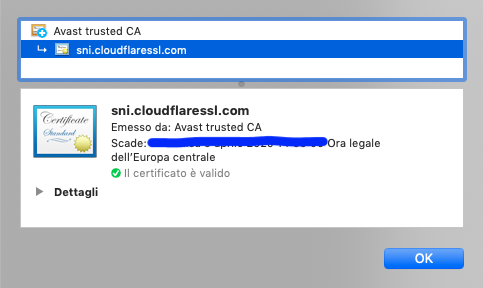
- Test: Just use your preferred browser and point the URL to https://[fqdn]. All will work showing the “green” locket and check if you’re using the right certificate: the issuer must be Cloudflare.
That’s all folks! Enjoy!