Protecting vSphere with Nakivo and Synology
After some laboratories focused on Nakivo a real case happened in this month: after bought a Synology NAS, a customer which owns a vSphere infrastructure wants to bring under protection (backup + DR) their virtual machines.
The acquisition of Synology NAS is the kicking point where Nakivo could rules this solution: one of the key point in Nakivo develpoments are the integration with “cheaper” NAS systems like Synology, QNAP, Asustor and WD. And after few minutes, the backup solution is ready to protect the whole vInfrastructure: let me say this case is an easy and effective way to keep under protection a small environment in a 2u rack space! Let’s see in depth…
Disclaimer: The customer doesn’t allow me to publish name and credentials. For this reason I can’t show detailed screenshot and accurate data.
Scenario
Customer owns a very light installation based on vSphere 5.1 Essential Plus with a vCenter for essential delivered in the same cluster… There is another “spare” server that could be switched-on to test or to recover data and main services.
The Synology NAS is delivered in the datacenter designed as DR Datacenter and is interconnected with a 1Gb dedicated infrastructure network.
Install Nakivo on Synology
The installation of Nakivo in the Synology is a real child’s play: a selection and Package Manager, and after download you’re able to configure the Nakivo instance simply pointing your browser to https://<nas_ip>:4443
It’s mandatory to ensure the connections between backup environment with production system: for this reason I used a router/firewall that has the guarantee the connection between the infrastructure lan with the backup network.
vSphere older than 6.0 still be supported?
Sometimes it happens to meet old vCenter versions like this: a 5.1 was still alive and customer wasn’t able to update to the last (-1) available version. In this case it was necessary deploy a Nakivo Legacy transporter to avoid problems I CBT versions during backup job. Simply follow the indications appeared during vCenter setup under Nakivo, then click the link to follow online instruction to download and deploy this legacy transporter.
The backup job
The backup job runs without problem and after 10hrs the amount of 5 TB of upfront backup were successfully protected. Every next jobs took about 15-20 minutes, depending on the execution timing: the workload has an important movement of data estimated as 500GB/day, so RPO for all workload can be not over 30min.
See to believe, then flash boot!
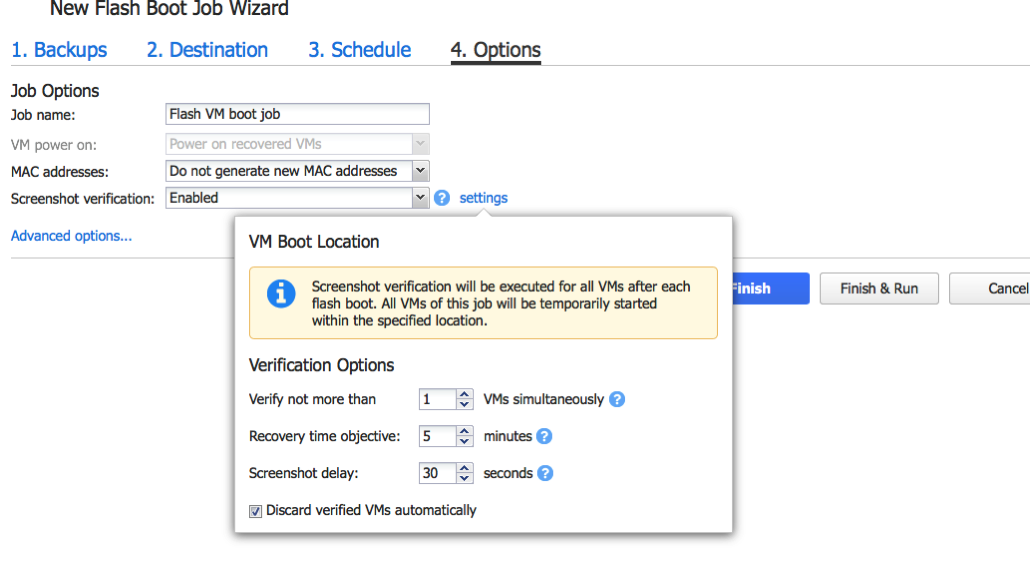
The flash boot is the most welcomed feature that was really appreciated by the customer: in few clicks he gains the ability to see a mounted VM in DR environment without wasting resources and calculating RTO in an “automated way”.
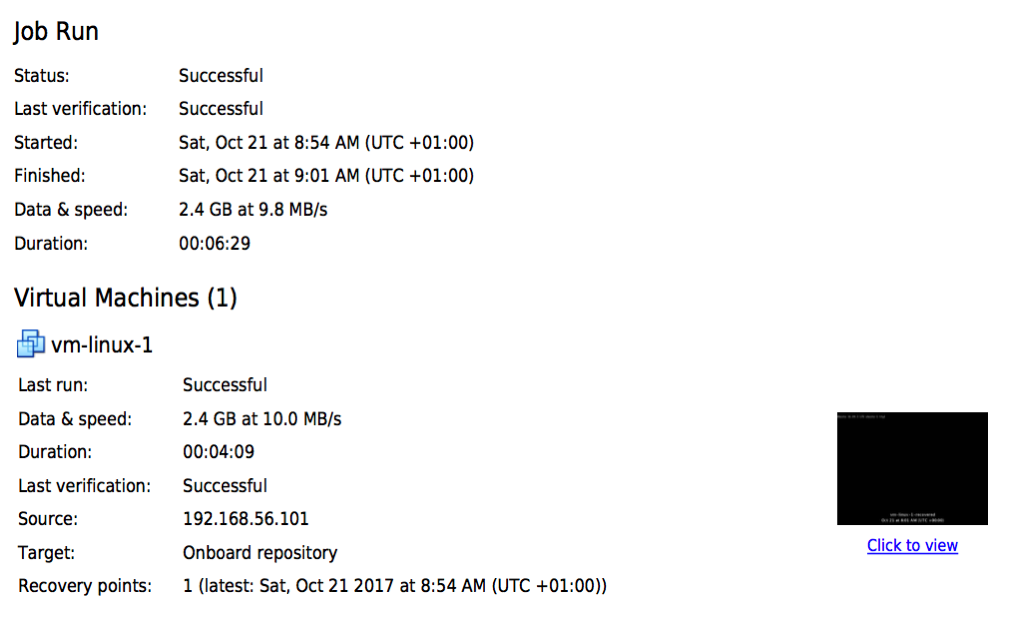
In fact one of the coolest feature available in every Nakivo editions is the test and send the report which contains the essential information needed to certify its application compliance.

Using the option “Screenshot verification” it is possible to attach the VM login screenshot in the report bringing the entire verification process at the max automatic level available for this process.

Note: due to permission denied from the customer, the images above are taken from my lab scenario
Follow Up
Customer really appreciates the quality/cost factor of this solution and the automation level, that really brings this software share the leadership with other competitors in the same ecosystem. On my point of view I really appreciate the simplicity of the implementation (few clicks to protect the whole vDatacenter).
With fast recovery it’s possible provide a secure and compliant solution to demonstrate the effective data protection and consistency to ensure the recovery of the whole virtual datacenter.
Final Disclaimer
This post is sponsored by Nakivo. Thoughts and experiences around Nakivo product come from my own.

